Plan the Quillow
For my Grandson

You can put a handle on the quillow or make a separate little tote bag so they can use it as a picnic or play throw anywhere
add a little pillow on the top edge and they can use it as a nappy sack
with an item in the center
Put Your small square in the middle and then fill in your block with scrap strips, so you use up all your scraps.
I first cut out all the pairs of small squares and laid them in a pile, and then just grabbed scraps and filled in the blocks after sewing the first small square on.
You could have a theme, Vegetables, Animals,
I am using my scraps from masks-so it is everything

Burger and fries block

Potato Chip Block


Kayak Block-K


I have 32 blocks- to I spy- 16 that repeat once somewhere
Each Center picture to have a solid color block cover that has the letter of the name on the front
flap underneath and a number of the sequence it is in on the quilt top.
After putting all the blocks out and figuring where they are going on the quilt- Numbers will be put on the front top of the flap so that you can say-- Number 5 or Number 7 and try to match the squares word items -like concentration....

You can make bigger quillow and do 52 blocks or more


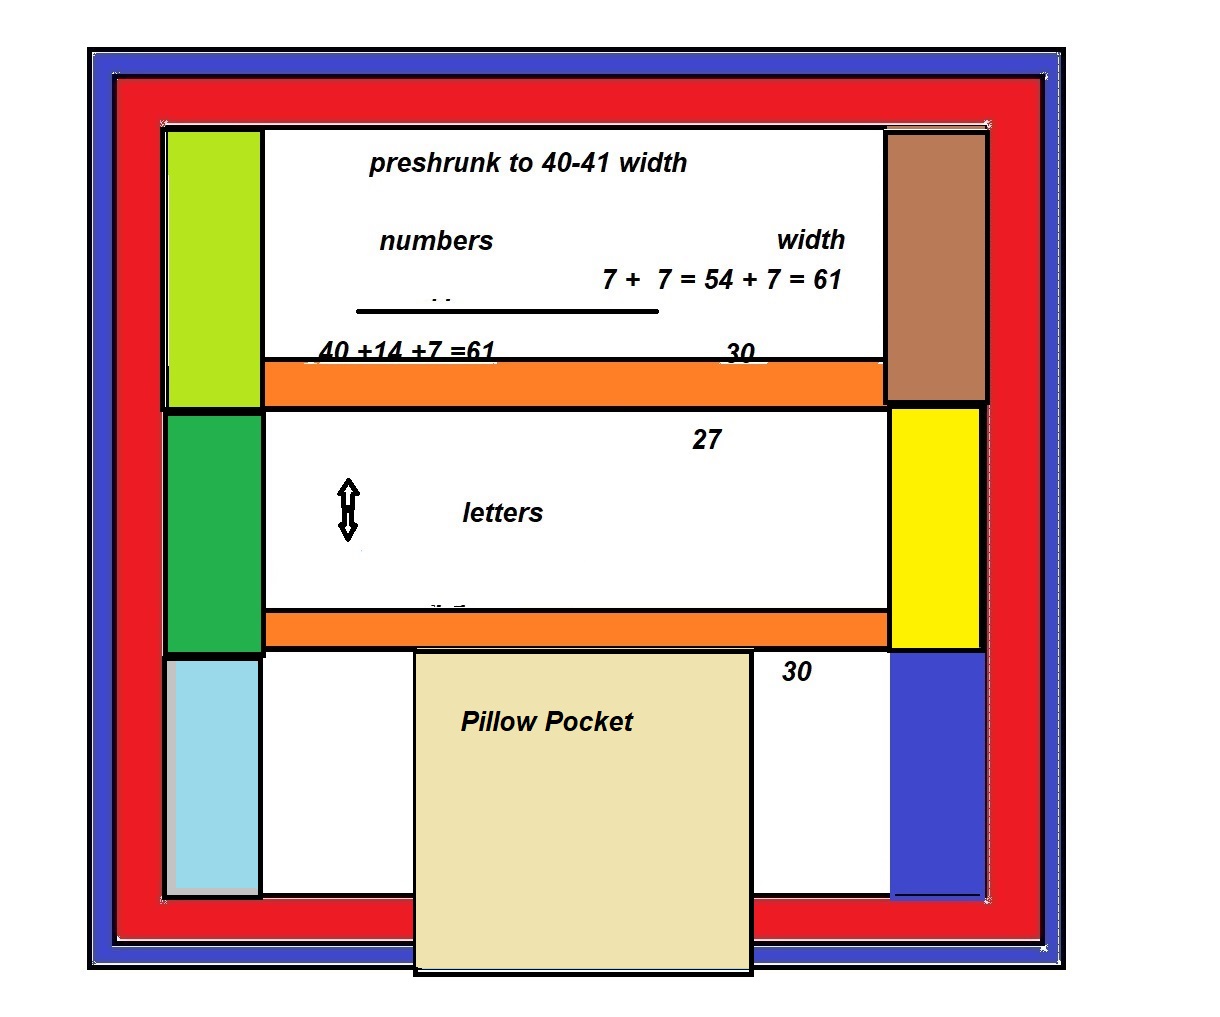
The pillow pocket is one third of the measure of the width
Step one Plan
Step Four - sew the front together to the exact size it will be
Step Seven - do a really cute pillow pocket and handles
You can do a smaller quilt just for play
There are 26 letters in the Alphabet so I wont have all the letters in the alphabet repeat
Pairs of everything so they can play concentration
In my case, I bought quarter yards of bright colored marble blender fabrics for the flap that goes over the I Spy concentration pic
Be back with more pics as I finish Steps
I...decided to quilt the back so I could freemotion differently than the front... so there will be a piece of flat batting on the back with quilting and the blocks will be sewn together with borders on the front.... then I can free motion just in the borders for fun before attaching the front to the back in a sandwich. Then I will probably machine tie quilt at corners and center of blocks.... we will see what I come up with...
Sometimes people say .."How do you do all these things at once?" I cut multiples... I have an accuquilt cutter and dies for letters... but in this case I had to make stencils for the numbers.. so it went like this
1.


3.

I searched for a stencil pic on the laptop... made it the size I needed for these quiltblocks-prt sc (print screened) the picture and then pasted onto paint..
cropped it to the stencil piece and laid my create-a-pattern piece onto the screen-used a marker and traced off my laptop screen on paint and then voila... stencils... laid on top of the poster board cardboard and cut around the number...
4.


lay a stack of fabric of different colors so I would have different colors of each number and cut around multiples.
Now this ISPY will also learn letters and numbers and can play concentration at nap time with themselves or during quiet time with others.
5.
Cutting many at once saves time and you are able to duplicate your projects by have the multiples ready after finishing one project to do a second.
I do the same thing with tops-jackets-and pants,etc.. cut out multiples and they are ready to sew more than one.