Sewing Tips, Patterns, Examples of All Types of Sewing, Design Ideas, Different types of Fabrics-from G Street Fabrics and Spoonflower
Saturday, October 24, 2020
Wednesday, October 21, 2020
Face Masks
wear them over your nose.... and the reason to wear them is to make a barrier so
don't stand in front of me with a big hole in your mask in the front..
Masks with Exhalation Valves or Vents
The purpose of masks is to keep respiratory droplets from reaching others to aid with source control. However, masks with one-way valves or vents allow air to be exhaled through a hole in the material, which can result in expelled respiratory droplets that can reach others. This type of mask does not prevent the person wearing the mask from transmitting COVID-19 to others. Therefore, CDC does not recommend using masks for source control if they have an exhalation valve or vent.
Tuesday, October 13, 2020
Fitting and changing styles of Patterns
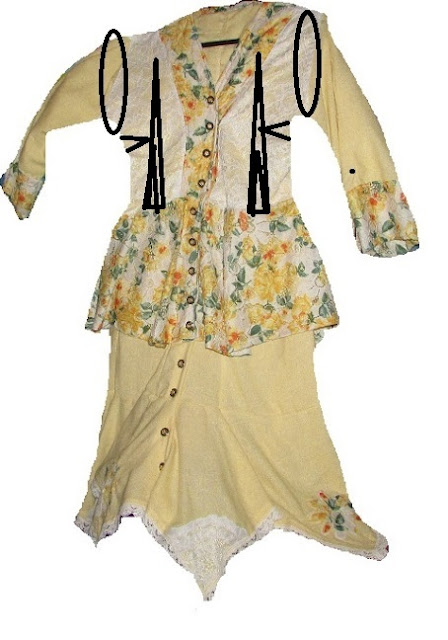
So after the darts from the set in sleeves and the darts to make the waist fitted at the peplum, I found I needed to do a full body dart up to the edge of the trim to take out the extra gapage...(word?) and in the back I did the same thing. I am big accross the back and still with the change from the kimono sleeves to the set in sleeves I needed to take more in... so I did the same thing in the back doing a full length body dart in the back too.
Pattern piece I overlaid over the original kimono sleeves to get a set in sleeve..
Here is one sleeve altered and set back into the bodice.... but side darts to the bodice had to be added first to make the bodice work with set-in sleeves otherwise there was a bulk gap in the fitting.
Lace kind of hid this, but it only takes a pinch and stitch to make the bodice have two darts one up and one side and then the sleeves fit back in perfectly.... Whether my big body will fit? I am very very shapely.... so I prefer baggy flowy things.... It is not that I am shy, but I find it unnecessary to show all my curves to feel pretty and feminine... I prefer the freeflowing fashion look. But this is to show you different ideas you can do with bits and pieces of things.
Here you can see where I just laid it on the top cut the sleeve off and added the dart on the side to fit the sleeve back in and make the bodice tailored.
******* The bodice originally was just baggy... I have now put a dart in the bottom of the bodice to attach the skirt waistline to the bodice waistline.... so that is a pointing up dart made by trying it on and making it fit at the waist. This causes some bulk gaping on the top of the bodice just under the sleeve... Now with the altering the sleeve to a set in sleeve I have added a side dart to the bodice ... This makes a fitted bodice...at the bustline
--> <---
/\ ** /\
The other thing that this does is pinch out the extra fabric to fit the new sizing of the set in sleeve as I put it back onto the coat dress top.
The peplum was just lace so it was very nice, but with the added buttons on the rest, I decided the peplum needed the pretty ribbon enhanced gold buttons, too. SO you see I started out with 3 pieces of 2.97 fabrics... added some expenisve venetian lace trim and then went for the fancy buttons... but I love the look!!!
In case the peplum edges flipped up when I was walking, I backed the edges with interfacing on muslin with some 2.97 lace strips topstitched on... This gave stability for the buttonholes and buttons, but also was pretty if the underedge look.
So, this is just showing you how I make patterns different by cross blending pattern pieces... You can have many different dresses just by pulling pieces from one and putting them on another. The other thing you can do is always mix textures as in this dress, or Color Block giving total different looks to simple styles... Making Simple look Complicated, but it is only simple with different colored panels or cuffs collars or bias trims.
Thursday, October 8, 2020
Facemasks
I added some facemasks to my Etsy Shop
All masks have a flexible nose insert you can shape to your face and you may purchase an optional cord to go in the second casing as a hanger when you take the mask off or as added security when you have the mask on to pull tightly and seal your top edge.
Free shipping and if you want cord just click the option with cording... on the Etsy shop site.
www.kittysfacemasks.com
Wednesday, October 7, 2020
Overlaying Lace and readapting a pattern to your body Using Your Machine embroidery for embellishing
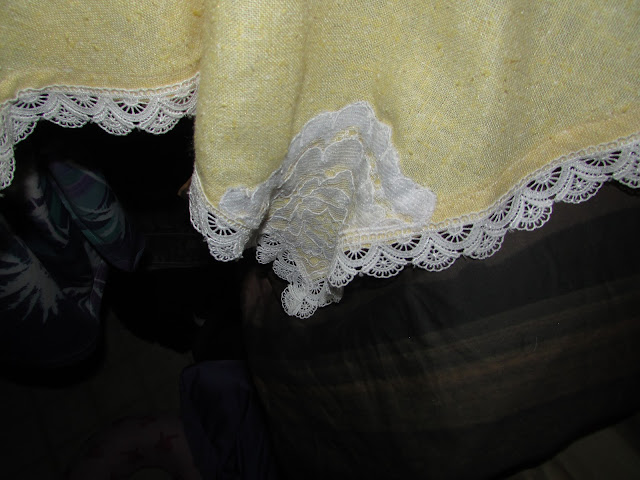
I started with this pattern and some bits and pieces of fabric I found in the 2.97 room and then when I decided to overlay lace I went to the 25.00 a yard white overembroicered lace and the venitian lace for the added white trim... and from then there was no stopping me...
I loved the tear drop edging, but after I overlaid the top, it needed some pizazz and I obliged...
I added alternation color imprinted lace like the peplum and then I trimmed the bottom with the venetian lace and finally I decided to slice it up the middle and sew the two pieces together to make a Coat Dress.... So the final outcome before I decided to add the pricey ribbon enhanced gold buttons and the matching shoes...????? is this look!!!
I am liking the look so far..
So this is how it is now... I have to finish the sewing of the over top to the dress and the button plackerts, but I have got some dark green of 3 different fabrics to make a dark green dress/blouse for under that has a rouched neckline of sorts with leaves coming over the top of this dress and I am going to embroider the veins in the leaves with verigated threads... so as I do it I will post the steps... LOL-I am trying to make myself finish this. I told them at work I would wear it on Monday...
I am copying the body lines from this pattern for the top of my coat dress... Originally it was kimono style so it is hard without set in sleeves. I am going to try to copy the body curve into my top of the dress.
There has to be an underdress if this is a Coat Dress, so here is the plan....
Forest Green Netting as the over dress with a rouched neckline and bias trim... with a little embroidery of leaves to go with the Coat dress designs... this embroidery of leaves will hang over as a collar would....
There will be a Hunter Green Georgette Chemise under this netting dress.... Using this pattern but without the waistline... just a simple straight full style with the neckline gathered, where it goes under the bias trim..
Finished Butterfly Coat Dress with underdress under and showing Teardrop sleeves with teardrop skirt.
I have some espadrille bottoms and I am going to try to put
some comfort sole bottoms inside to wear to
That is a Shoe experiment .
Friday, September 11, 2020
SEWING BY HAND
Yes, I am sewing by hand... the last of my backup sewing machines went kapukkk... (they are over 25 years old)..well, I sew everyday... so I figure they more than earn their keep with the facemasks and my regular sewing... so
here is what I am doing right now...
I did the front and quilted it and the back and the lining .... put everything together with the sewing machine,... got to the D rings and the top band... and was playing with the handles and jam...
I pulled on the thread that was in the hook (bobbin case holder) and pulled everything out of alignment.. so now it won't sew... I am trying to finish this up because I LOVE it!
The tweed fabric is neoprene. I was going to originally use it alone to make the tote, but as usual, my mind went wild in the fabric store... so I found this faux leather that looked braided and I love it for totes... so I lite heatnbonded the quilt lady to the neoprene and then overcast the edges of her and freemotion quilted her to the front of the neoprene... then I overcast the neoprene to the faux leather and free motion quilted the neoprene all around the quilt lady.... then I sliced the quilt lady top with an art knife and made a pocket out of her...I then put a piece of solid black faux leather as trim at the top edges of the quilt lady pocket... see next pic...


