Wednesday, October 7, 2020

Overlaying Lace and readapting a pattern to your body Using Your Machine embroidery for embellishing


I started with this pattern and some bits and pieces of fabric I found in the 2.97 room and then when I decided to overlay lace I went to the 25.00 a yard white overembroicered lace and the venitian lace for the added white trim...  and from then there was no stopping me...


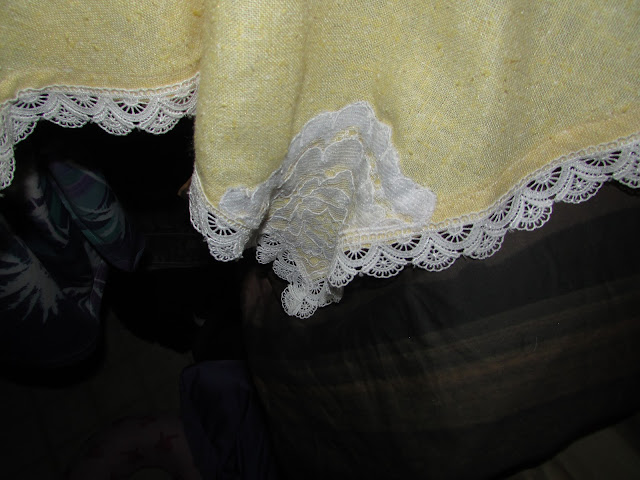
I loved the tear drop edging, but after I overlaid the top, it needed some pizazz and I obliged...

I added alternation color imprinted lace like the peplum and then I trimmed the bottom with the venetian lace and finally I decided to slice it up the middle and sew the two pieces together to make a Coat Dress....  So the final outcome before I decided to add the pricey ribbon enhanced gold buttons and the matching shoes...?????  is this look!!!


I am liking the look so far..


So this is how it is now... I have to finish the sewing of the over top to the dress and the button plackerts, but I have got some dark green of 3 different fabrics to make a dark green dress/blouse for under that has a rouched neckline of sorts with leaves coming over the top of this dress and I am going to embroider the veins in the leaves with verigated threads... so as I do it I will post the steps... LOL-I am trying to make myself finish this.  I told them at work I would wear it on Monday...  


I am copying the body lines from this pattern for the top of my coat dress... Originally it was kimono style so it is hard without set in sleeves.  I am going to try to copy the body curve into my top of the dress.


There has to be an underdress if this is a Coat Dress, so here is the plan....
Forest Green Netting as the over dress with a rouched neckline and bias trim... with a little embroidery of leaves to go with the Coat dress designs... this embroidery of leaves will hang over as a collar would....

There will be a Hunter Green Georgette Chemise under this netting dress.... Using this pattern but without the waistline... just a simple straight full style with the neckline gathered, where it goes under the bias trim.. 


The style will be between these two types, but with the embroidery enhancement.... as in this


Butterfly Underdress with Chemise under it

Finished Butterfly Coat Dress with underdress under and showing Teardrop sleeves with teardrop skirt.
Underdress is slightly longer so the dark green teardrop skirt shows under the venetian Lace Teardrop on Coat dress
Sewn on one side with the same gold flower button as the central point

I have some espadrille bottoms and I am going to try to put

some comfort sole bottoms inside to wear to 


That is a Shoe experiment .


I have the shoe bottoms... the insoles and the tools to do a shoe... maybe  a wrap of some kind for comfort....


Friday, September 11, 2020

SEWING BY HAND

 Yes, I am sewing by hand... the last of my backup sewing machines went kapukkk... (they are over 25 years old)..well, I sew everyday... so I figure they more than earn their keep with the facemasks and my regular sewing... so

here is what I am doing right now...

I did the front and quilted it and the back and the lining .... put everything together with the sewing machine,... got to the D rings and the top band... and was playing with the handles and jam...


I pulled on the thread that was in the hook (bobbin case holder) and pulled everything out of alignment.. so now it won't sew...  I am trying to finish this up because I LOVE it!  

The tweed fabric is neoprene.  I was going to originally use it alone to make the tote, but as usual, my mind went wild in the fabric store... so I found this faux leather that looked braided and I love it for totes... so I lite heatnbonded the quilt lady to the neoprene and then overcast the edges of her and freemotion quilted her to the front of the neoprene...  then I overcast the neoprene to the faux leather and free motion quilted the neoprene all around the quilt lady.... then I sliced the quilt lady top with an art knife and made a pocket out of her...I then put a piece of solid black faux leather as trim at the top edges of the quilt lady pocket... see next pic...


Before Quilting


After Quilting
and
 Making Pocket on Front out of Quilt Lady


Now you have a tote with no handle or strap.
This one I added a tab with two D rings on each side for a shoulder strap... The tote handles were mad by folding a strip inward to give it quad strength and leaving the bottom open to fold under and attach to the tote.

I made a wide soft strap to slip through the D rings and then I can use the shoulder strap when I fill it up and use the tote handles to take some weight off the shoulder.


After handles and D Ring Strap

DONE!

Tuesday, September 8, 2020

Making Reususable Face Masks

 I have some Face Masks Available:

OOps Sold

This is a nice roomy 7 inch nose to chin with soft elastic loops  

OOps Sold
This is also a 7 inch roomy nose to chin, but these have my nice nose inserts which keep them above your nose on your face, even when talking to people.

OOPs Sold

These are all the same size and fabric prewashed before making the masks
muslin filter pockets doubled for 3 layer fronts and soft elastic loops with a second casing for a hanger cord.

If you want a hanger cord that is 5.00 and I will have it inserted before pickup..

These are not your flimsy reversible masks.. you have the option of putting a filter in, but they are already 3 layers in front.  I wear them for 10 hours at a time and talk at the job, so I have tested this pattern over and over again.  Comfort and as much security as you can have in a cloth mask.
Washable, take nose inserts out of casing they must slide out when you bend your mask flat and then put them back in after washing.

You can go to my Etsy store and just pay for it and then pick it up with an email appointment with me.  I can bring them to the store in Rockville-North Bethesda and give them to you on my break or before or after work.  They are pre-steamed and packaged in a ziplock-ready to wear or gift giving.


If you see mine and think it looks comfortable, it is.  I wear them 10 hours at the store so here are the instructions that I improvised on:


In the filter pocket part I do 4 pieces instead of 2
sew the filter pocket together and flip it so only the top and bottom have a raw edge.  I do top stitch around it to make it nice and flat.  That gives me a 3 layer front and I don't have to put a filter in the pocket. 
Green Garden Twist shows you where the cord casing is and can be used to pull a cord through


2nd improvision, when I fold over the ends of the finished mask over the circle of elastic, I make a second row of stitching for the Cord that you see me wearing.  This works for me two ways.  One it is great to pull off the mask in the car and use as a hanger, but the 2nd most important way to me is that I can tighten the mask on the top edge of my face under my eyes to seal it off.   So many people do not have their masks on properly in public places that I feel that I need this extra precaution.

My nose inserts are these... 

and they form to your face and are flexible but stay with 
I use 2 white flat plastic nose inserts and tape a piece of 22 gauge floral wire inside of them and do a very spaced wrap tucking the end back inside the 2.  This bends - stays and is removable for washing.  The insert will totally conform to your face for comfort and staying power.

The nose casing is however long the insert is and is between the filter and the front directly over the middle of the mask.


PDF for Making Olson Mask

https://www.unitypoint.org/cedarrapids/filesimages/Coronavirus/003902oo-1%20Olson%20Mask%20V07.pdf


Monday, September 7, 2020

Making things with Paint


 I loved this house.... and it had a blank slate for a basement... concrete floors and cinderblock walls and open beam ceiling...

Nothing done... I used to roller skate around the big basement for exercise... after I got home from work to destress... Then my mind started creating... so I painted the walls white first..and hung some Van Gogh Reproduction Prints on each wall of the basement and visualized... then started creating... with Garage Floor Paint... and Stained Glass...  This was the cafe... I was taking Piano and guitar and this was my Music Dance Studio...


I started with the doorway... LOL.. the previous owner had left this really heavy door against the wall and I couldn't move it.. so I painted around it and that was the start...  As you can see I looked at the cafe painting and copied the doorway... and then I went on to the Pebble floor and stone patio.  Probably, the table that I already had and the door I couldn't move made me decide to do this when I was skating in circles around the basement on the concrete floor... You can imagine.. my mind was creating while I was skating.  This is the same thing I do when I am kayaking and there are not any fish or large turtles or heron to capture my camera focus or my mind focus.... 
Sometimes I feel I am a tortured creative soul, but I am laughing as creating-not wanting to cut my ear off.


I took up Guitar and Piano and Just had a hoot of a time... working hard and playing hard for ten years...


This side was really elaborate... I did the paint first and then the stained glass windows and the walls... then the copper ceiling tiles...and of course, the fab pool table..  pity the phone company man who bet us a game of pool...RFLOL  We won!

When I bought this house the beams were covered with mud from the original building of the house, apparently the owners never used the basement at all... I did enjoy this place for about ten years.... I got my monies worth just out of the creative fun in the basement.

With the help of a fabulous electrician who was helping me with the bathroom you can see to the right.... He suggested I have a mirror ball over my dance floor and it would rotate when I practice my dancing with the pole you see there... LOL... I had two of those poles one on each side of the dance floor and I would swing dance and hustle with the help of jumpropes tied to the poles as arms...

I had the best time dancing.........Jack Vettriano Paintings to dance with me...


'Dance Me to the End of Love'

'The Singing Butler'
They just felt right on the wall in the dark glow of the mirror ball spinning....

And that was just part of the wonderful life I have led, but a Decade ode to the painted basement with the full studio in the back of the basement... for sewing and stained glass...with builtins and a custom exhaust fan for stained glass...This was the basement...

I did use some FABRIC upstairs... and the ceiling of the dance floor was the mirrored fabric of the time.

All of this fabric came from G street ... Notice the chair seats are covered with the same fabric as the draperies...and we carried the look into the kitchen which had an open wall into this family room.

This is where the draperies matched in the kitchen and the kitchen table slipseats were the same fabric  with a white country farmhouse table and dark wood table top

Fun in Every Room for Decorating


Truly the Country Quilters Spare Guest Room, right down to the stenciling on the old wooden chest for the linens and a dry sink on the side